How To Make Your Own Probe2Bolt Adapters!
As part of our Kickstarter campaign, we promised to make a DIY video outlining how to make your own Probe2Bolt adapters at home. If you bought a pre-made Probe2Bolt Adapter set from us, this page is also for you! You will learn how to alter your Probe2Bolt blanks, included in your set, to fit any odd-ball test connections.
NOTE: We are working on improvements and edits to the video and instructions. Hopefully we’ll have edited video out in mid march. We’re leaving the original “one-take” video up for now. It runs long, but there are many tricks for prototyping with thin brass that may be useful if you don’t know them yet. The one-take does show you can make one of these in 20 minutes.. likely much less if you’re not pausing to explain the steps.
Obviously this is sort of the middle ages way to do things.. It’s handy if you need a specific shape in thin metal quickly. If you need more than a few odd pieces, find someone with a fiber laser or waterjet, like our friends at Portland Waterjet
Material and Resources used in video:
We suggest you support your local hardware store or hobby shop where possible! If you’re an internet billionaire who wants to try out late medieval tinkering, you can have a minion order all this stuff online! (note, solextract personnel have no problem with internet billionaires. Except maybe Ellison.
| Brass sheet | We use 0.020″ thick (24 gauge) cartridge brass, alloy C260 | Online Metals and other places Support your local hobby shop! |
Shears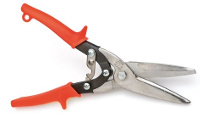 |
Wiss or the like straight sheet metal shears | available from hardware store or homedepot I love the Wiss M-300 |
Nibbling Tool 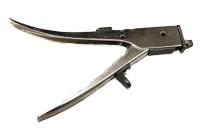 |
Generic/ Philmore You must get one! | Available from Frys: Frys or Digi-Key |
Round punch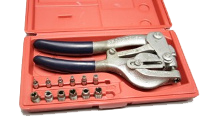 |
Roper Whitney #5 JR hand punch with 1/4″ punch installed, don’t need it, but great to have! | Roper Whitney or try Amazon. |
Files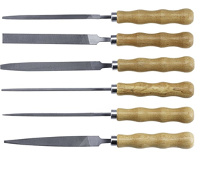 |
half-round file, or round file + flat file. | Ah.. good luck, I had a devil of a time finding a decent small half-round locally. You might try getting this set at Rio Grande |
Vise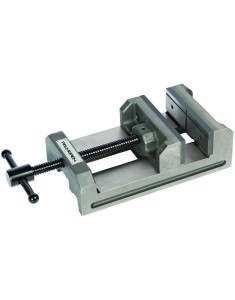 |
Drill press vise, or vise with smooth, parallel plate jaws. You want the jaws to have a sharp 90° angle and meet flat, flush and parallel at the top so you can support the brass close to where you’re cutting it with a file. | We’re working on that for you, or try Palmgren) |
Sandpaper |
220 grit sandpaper. I like Silicon Carbide wet-dry. | Get it from hardware store. I tend to buy 3M products if I have a choice for things like tape and sandpaper. |
Flatnose pliers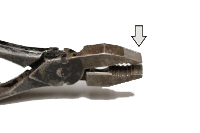 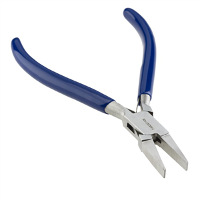 |
Flat Nose pliers for bending over 90° | I made mine on a bench grinder from some old pliers. Try hobby shop or Rio Grande. |
Template |
Laser printer and label stock I use Avery 8126, 2 big labels per letter size sheet. | Office store, Target or Avery |
Here we go with an unedited, stream of consciousness, soothing music accompanied, many useful tricks demonstrated video:
Written Steps
Note… all of these tools can cut you easier than the metal you’re trying to work with. Read all the safety instructions that come with each tool. Don’t be tempted to use a drill on sheet metal unless you know good secret tricks. Sharp sheet metal is also more hazardous than you’d think. Keep work area clean and keep sharp little parts, trimmings and remnants out of reach of children.
- Print template onto label stock and stick onto C0260 Brass sheet. Verify Dimensions using a ruler or calipers. Or even the bolt you want to use the part on.Click Here to Download PDF TemplateIf you’d like an svg, email us and we’ll get it to you. We could also give you a DXF or Varicad DWB file!
- Cut rough external outline of adapter shape with sheet metal shears. Get as close to the lines as you can without cutting into them.Use Nibbler to detail cut around the outside of the shape lines.
- Use Nibbler or a round hand punch like the Roper Whitney #5 JR to open up the internal cuts for the slot. Again, try to avoid cutting into the line.
- Using a file and a smooth jaw vise, clamp the part in the vice as close as possible to the line you want to file down to. File down to the lines. The vise is at least as important as the file. You need to support material you’re cutting close to the cut.
- Remove label and label glue. We found solder flux remover wipes out label adhesive good. You might also try heat. (not at the same time as the flux remover!)
- Make initial bend in the back with flatnose pliers. Bend just over 90°
- Finish the bend to 180° by carefully squeezing in vise. We actually use an arbor press (Dake Model X) with 4 pieces of brass stacked as a shim to stop the ram at a consistent spot. If you’re using a pliers, you might practice on a few scrap pieces before trying the one you just filed out carefully. Reference Video Above